Since I post a lot of sound clips here at Audival that are absolutely free to use in your podcast it might be time to give a proper explanation on how I would incorporate them in a podcast.
Say you find a sound clip here that you like and decide that you want to use it. The first thing that you might notice is that many of them end quite abruptly. “Why?”, you might ask. That won’t sound very good at all times. The reason is simple, I want to give you the chance to fade it however you want, or not at all if you don’t want to.
Editing the audio
So how to get the audio to work for you? First, import the clip onto a separate track in your audio application.
The first thing to decide at this point is whether you want to use the whole sound clip or not. If you don’t want to use the whole clip then simply cut out the piece you want and delete the rest. In pretty much any audio editor worth it’s name this action is totally non-destructive, which means that the original file will be completely intact. If you’re unsure about this, consult you applications manual.
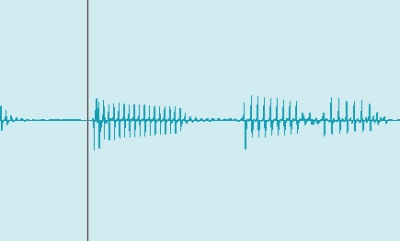
When you cut the waveform it’s important that you cut where the waveform is in the middle, id est, not on it’s way up or down. If you cut it wrong it’s likely you will hear a pop or a click when you play it back. If that is the case try cutting it better (undo is your friend), or if that’s impossible, create a very short fade at the end of the waveform. Most audio applications can create short fades like this, consult the manual for how to do it.

This is a really bad place to cut the audio.

This is the correct place to cut it. The waveform is not on it’s way up nor down. You can zoom in pretty close to be sure if you want to.
Fading or ending abruptly
The second thing you will have to decide is if you want to fade it out or if you want it to end abruptly. Note that if you want to fade it out you probably don’t want to use the fade command I described above to get rid off clicks and pops. Instead I would do this by simple automating the volume control for the specific track. Most audio applications have a way of automating the volume, so again, if you’re unsure about how to do this, consult the specific applications manual. It’s usually a very simple task that’s done with the click of a button and then moving the volume control during playback. Many applications also let’s you draw the automation curve by hand in case you prefer that.
Voice over music
Perhaps you want to have your voice over the music? Like and introduction? In that case it could be a good idea to lower the music as the voice comes in and then raise it again once the voice leaves. Again, try volume automation for this. Or why not ducking?
Here’s two previous posts on the topic:
Video of side-chain compression (ducking)
Originally posted on December 4, 2007 @ 4:37 am