 So you’ve got your microphone hooked up to your computer, it receives sound and you have found the record button. However, when you try to record your voice it just doesn’t sound good. What’s the problem? Today I’m going to discuss some general techniques for recording through a microphone. I’ll follow up this post at a later point with a post on how to process the recording.
1. Speak with confidence! This is definitely not a mic technique, but a vocal technique. Make sure that you don’t sit and mumble for yourself. I think this is a common mistake, especially by people who sit and record by themselves.
2. Think about the distance to the mic. Depending on the microphone you use, and depending on what sound you’re going for, you should have it at different distances. And perhaps more importantly when recording spoken word, you should keep it at a constant distance. A major flaw I hear in amateur podcasts is the typical change in sound that you get when the speaker suddenly leans backwards in his chair, thus getting an additional meter to the mic. The change that occurs there is not only volume either. No, the change is also in the character of the sound, because the sound being picked up (you) have moved from one place in the room to another. This is especially apparent when recording with condenser microphones as they pick up more of the sound than dynamic microphones do.
What distance should you have then? Record a few words at a a couple of different distances to hear the differences, then choose the one you like best. Generally, though, with a condenser mic you should be a bit farther away (a few decimeters is certainly no problem) than with a dynamic mic, the latter which you can almost let your lips touch the membrane (don’t do that however).

3. Think about the angle. If you’re reading from a paper, script or whatever, it’s a good chance that you will turn your face and mouth a little from the mic from time to time. This can also result in poor sound, so make sure that you’re aiming well. It’s especially important when using dynamic microphones.
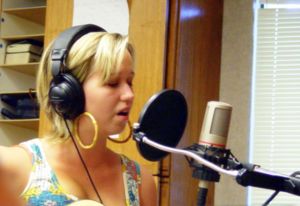
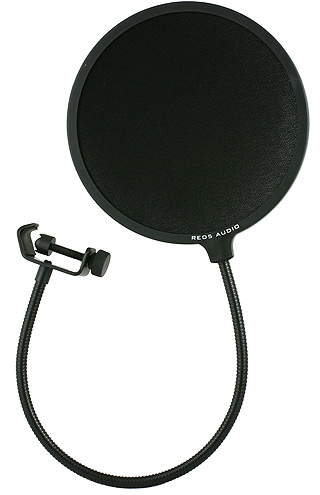
4. Kill the sibilants. Sometimes, depending on the vocalist and the mic, a lot of s- and p-sounds will be present. This doesn’t sound good at all. While actions against it usually takes place in the editing and mixing phase as well, there’s no need to hold back against it at this point. There are pop shields available that helps to deal with these types of sounds (they’re also good for reminding you of the distance to the mic!).
The poor mans solution is making your own with a pair of stockings, or using the pen trick. As you can see on this crappy quality picture, just attach a pen to the mic so that it splits the sounds. I only use pop shields and the likes on condenser microphones.
5. If you record digital, red is a no-no. Back in the day, when analog ruled the world, it really didn’t matter if your input meters hit red when you recorded. In fact, it was often used for effect because it creates analog distortion which is pleasant to the ear. When you do this in the digital domain, however, it creates digital distortion which sounds awful. Because of that I make a habit of recording with the meters around -12dB, but some go as low as -20dB. You don’t have to be as exact, just keep in mind that louder in-signal isn’t necessarily the best or the loudest out-signal. Raising the volume fader after you’ve recorded isn’t hard, but getting rid of digital distortion can sometimes be impossible once it’s there.
Keep in mind that depending on which software you use the metering will be different. For instance, some applications will show meters going as high as +12dB, which in most cases mean that +12dB should be considered the zero point. The most common metering seems to +6dB. Consult the software manuals for details on this.
Originally posted on August 17, 2010 @ 1:26 am